

Maximize Your HVAC System Efficiency

90% of your time is spent indoors, let us make it enjoyable for you.
3 Easy Steps of the Aeroseal Process
Common Duct Problems & Solutions
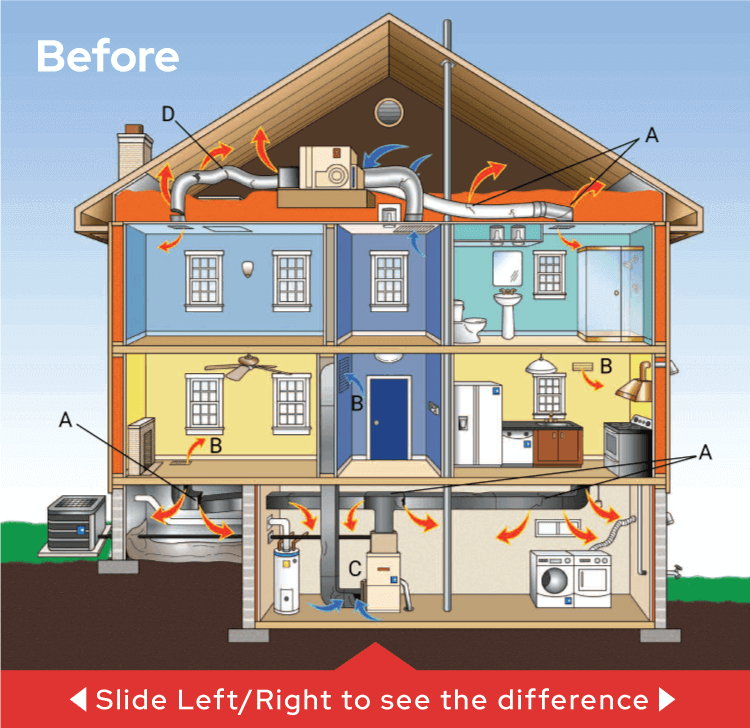
Problems (Before):
A. Leaky, torn, and disconnected ducts
B. Poorly sealed registers and grills
C. Leaks at furnace and filter slot
D. Kinks in flexible ductwork restricting airflow
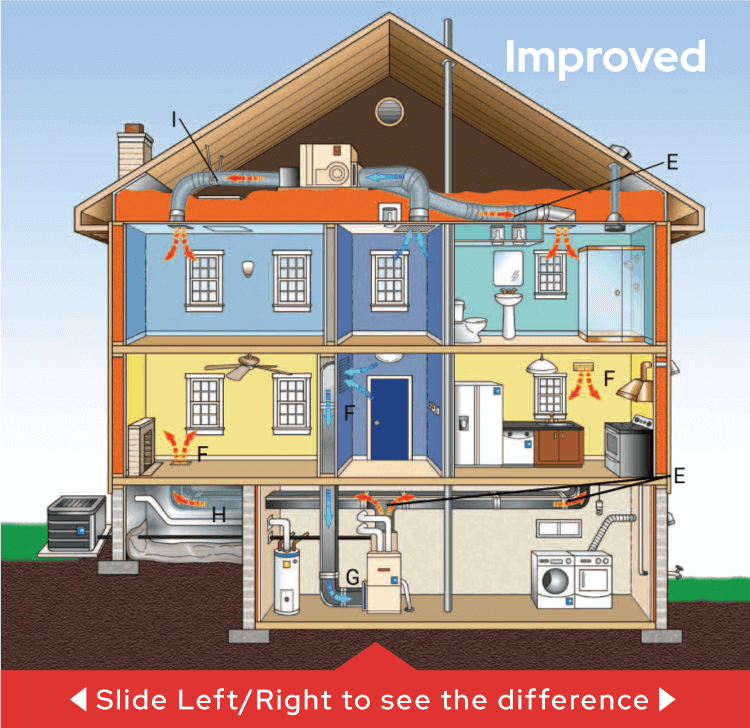
Solutions (Improved):
E. Properly sealed ducts
F. Registers and grills tightly sealed to ducts
G. Sealed furnace and filter slot
H. Well-insulated ducts in unfinished areas
I. Straightened flexible ducts with improved airflow
STEP 1: Prep & Test

Prepare System / Blocking Registers are temporarily blocked with foam plugs to force air in the duct work to escape through any leaks. Then the air conditioning indoor coil, fan, and furnace are also temporarily blocked with a foam plug to prevent sealant particles from entering this part of the HVAC system.

Connect System to Ductwork Once the system is properly prepped, the Aeroseal machine is connected to the duct work using lay flat tubing. A small access hole (which will be closed upon project completion) is cut into the supply or return, and a temporary collar is attached. One end of the tubing connects to the collar; the other end connects to the Aeroseal machine.

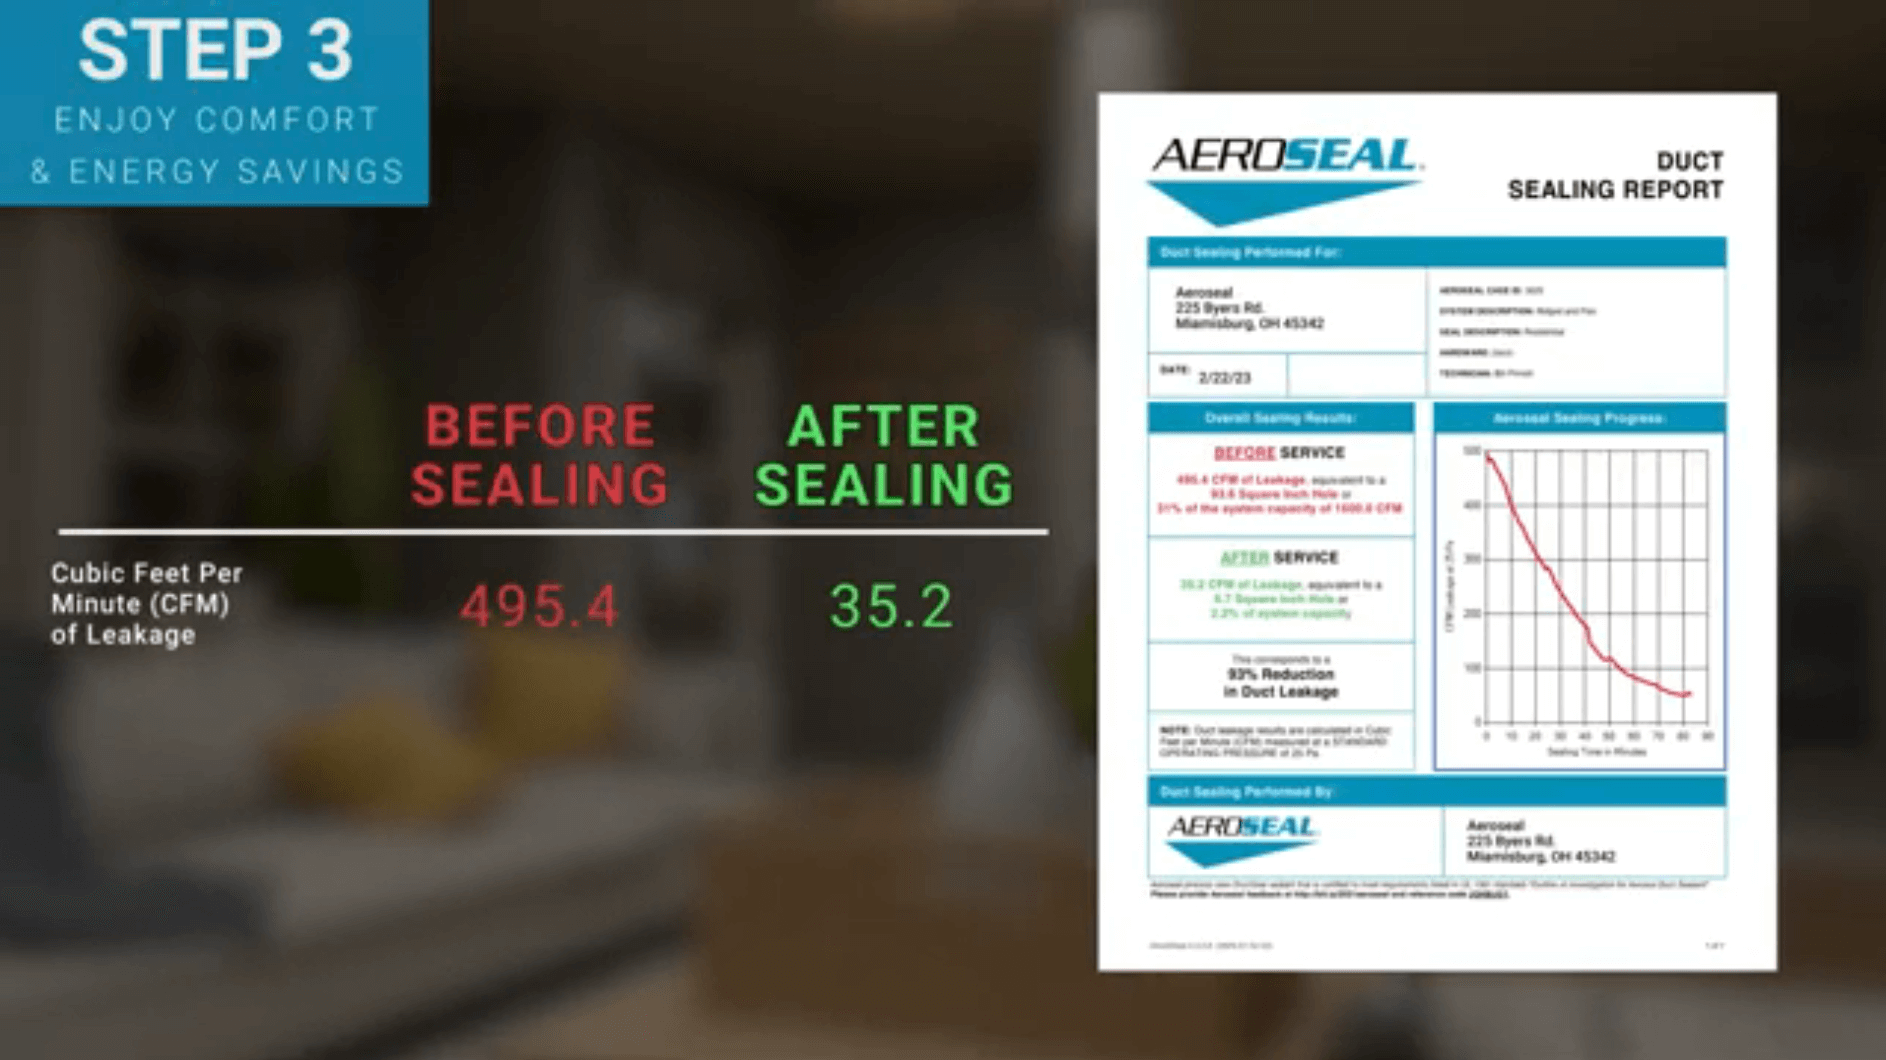
Pretest Ductwork The Aeroseal system runs a pretest that pressurizes the duct system and provides a leakage reading on the computer. It will detect the exact amount of duct leakage in the duct system (the typical duct leakage detected in a home is between 30-40%).
STEP 2: Seal & Measure
Leaky Ducts Are Found The patented aerosol sealant is injected as a mist into the ductwork. Holes and cracks in the duct system are found by the pressurization.
Sealant Seals The Ductwork The aerosol particles collect on the edges of holes and cracks in the ductwork to seal them from the inside.
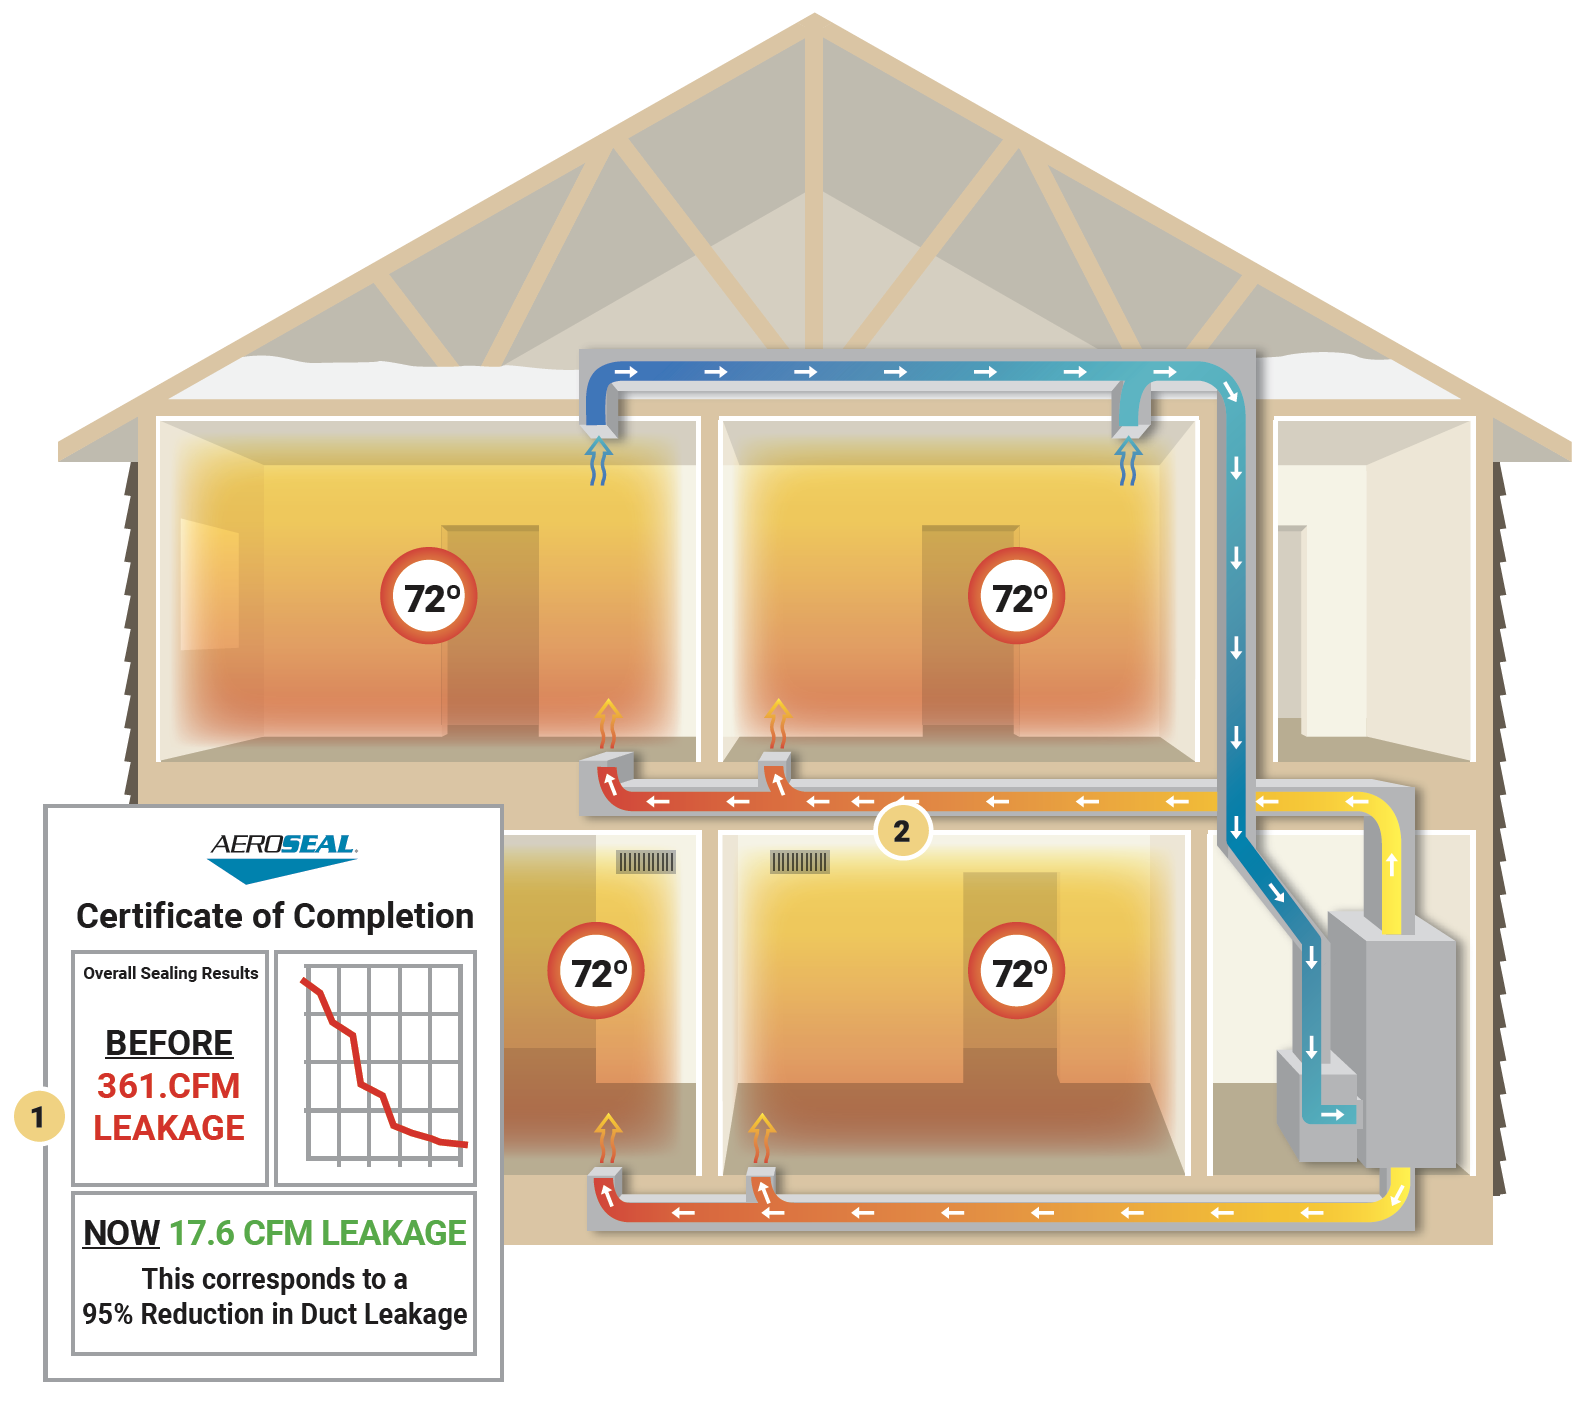
Monitor Process This entire process is computer controlled so technicians can monitor the progress in realtime and watch the minute by minute reduction in leakage.

STEP 3: Enjoy Comfort
& Energy Savings
Certificate of Completion Upon completion, the homeowner is presented with verifiable proof of the seal in the form of a computergenerated certificate, which includes before and after results of the Aeroseal application.